IDEA quickly adds JavaDoc comments
As a programmer, adding Javadoc comments can be considered an essential step. However, manually adding extensive content each time can undoubtedly become a cumbersome task.
This article serves as a record, aiming to facilitate the process of reconfiguration when changing environments in the future:
(The method described here is auto-generated by IntelliJ IDEA and does not require installing additional plugins.)
Class、Interface Comments
- File–>settings–>Editor–>File and Code Templates–>Files–>Class
- Add documentation comment templates to the template:
1 | |
Once completed, every time a class or interface is created, the comments will be automatically generated.
Method Comments
- File–>Settings–>Editor–>Live Templates
- Click on the right-hand side
+icon, select `Template Group…, and create a new custom template group. You can name it with your desired name. - Select the created template group, click on the right-hand side
+icon, chooseLive Template, and set the value ofabbreviationto*. - Set the template content: Choose
Template Textand enter the following code below:
1 | |
- Configure where this template should be effective: Select
Define“ below, then chooseEverywhereandJavato ensure it only takes effect in Java files. - Select the
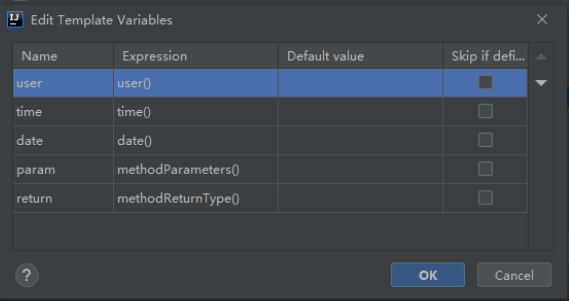
Edit variablesbutton on the right-hand side and configure as follows:

- Use
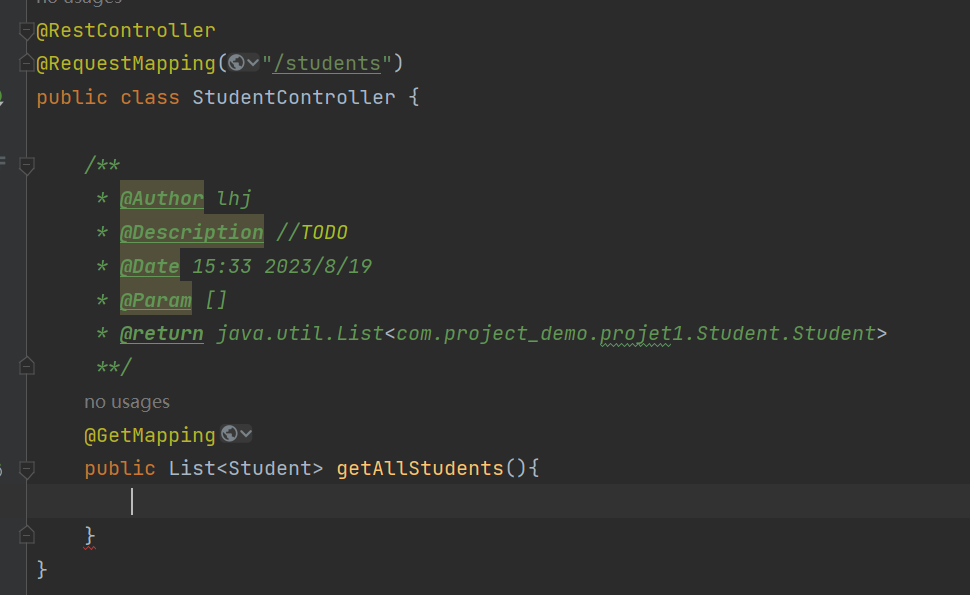
/*+ the template name we just set (in this case, it’s the asterisk*) +tab(this is the default template expansion shortcut, as set inBy default expand withabove). So now, when you use/**+tab, it will auto-complete, and the effect will be as follows:

With this, the configuration is complete.
All articles in this blog are licensed under CC BY-NC-SA 4.0 unless stating additionally.
Comment